If you’ve noticed your hens scratching more than usual, looking restless at night, or showing patches of missing feathers around the vent area, there’s a good chance you’re dealing with mites. Chicken mites are one of the most common problems in backyard flocks, and they can escalate from a minor nuisance to a serious health threat surprisingly fast — causing anemia, weight loss, reduced egg production, and in severe infestations, death.
The instinct for many keepers is to reach for a chemical treatment. But for backyard flocks — especially those producing eggs you’re eating or selling — natural methods are often the preferred first line of defense. Used correctly and consistently, they work. This guide covers how to identify a mite problem, the most effective natural treatments, and how to build a management routine that keeps mites from coming back.
Know Your Enemy: Types of Chicken Mites
Not all chicken mites are the same, and knowing which type you’re dealing with helps you target your treatment correctly.
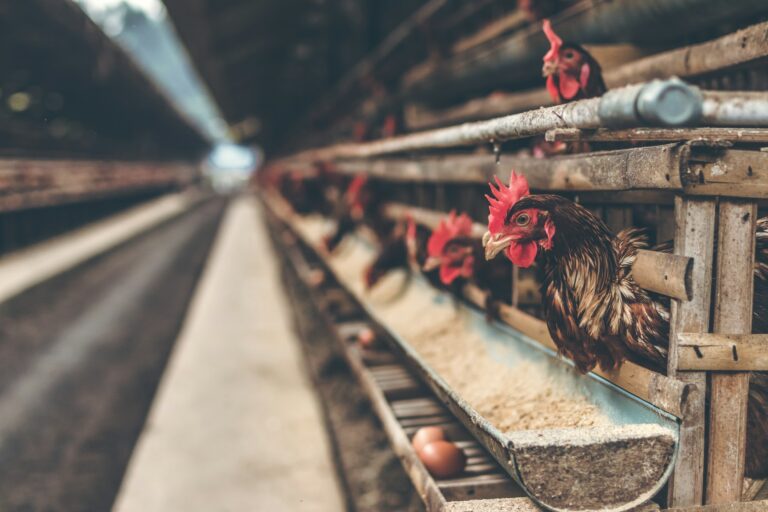
Red mites (Dermanyssus gallinae) are the most common and arguably the most problematic type in backyard flocks. They’re tiny — about 1mm — and gray or white when unfed, turning red after feeding on blood. The key thing about red mites is that they don’t live on the bird during the day. They hide in cracks, crevices, under roosts, and in bedding during daylight hours and come out at night to feed on sleeping birds. This makes them easy to miss during daytime inspections. Check your coop after dark with a flashlight — if you see tiny moving specks on the roost bars or walls, you have red mites.
Northern fowl mites (Ornithonyssus sylviarum) are the other major species in the US. Unlike red mites, northern fowl mites live permanently on the bird — in the feathers around the vent, under the wings, and around the neck. They’re visible during daytime inspections as tiny dark specks moving through feather shafts, often with egg clusters (white deposits) visible at the feather bases near the vent. Northern fowl mites multiply rapidly and cause significant irritation and blood loss.
Scaly leg mites (Knemidocoptes mutans) burrow under the scales of the legs and feet, causing them to lift, crust over, and become deformed. They’re slower-moving than the other types and the damage is distinctive — if your hens have rough, raised, crusty leg scales, scaly leg mites are almost certainly the cause.
Identifying which type you have shapes your treatment approach — red mites require heavy focus on coop treatment, northern fowl mites require direct treatment of the birds, and scaly leg mites need a specific leg-focused protocol.
Natural Treatment 1: Diatomaceous Earth
Food-grade diatomaceous earth (DE) is the most widely used natural mite treatment in backyard chicken keeping, and for good reason — it works mechanically rather than chemically, meaning mites can’t develop resistance to it. DE is made from fossilized algae ground into a fine powder. Under a microscope, the particles have sharp edges that damage the exoskeletons of insects and mites, causing them to dehydrate and die.
For coop treatment targeting red mites, apply DE thoroughly into all cracks and crevices where mites hide — along roost bar joints, in nesting box corners, under roosting boards, and along wall seams. A puffer bottle or squeeze applicator gets DE into tight spaces more effectively than sprinkling by hand. Apply a light dusting to the coop floor and bedding as well.
For bird treatment targeting northern fowl mites, dust birds directly by parting feathers and applying DE close to the skin, focusing on the vent area, under wings, and around the neck. Hold the bird away from your face when applying, as inhaling DE dust is not good for humans or chickens. Do this outdoors or in a well-ventilated space.
Reapply after any rain or full coop cleanout, as moisture renders DE ineffective. Consistency is key — DE works on contact and doesn’t have a residual effect once it gets wet or compacted.
Natural Treatment 2: Wood Ash and Dust Baths
Chickens instinctively dust bathe to control parasites — it’s one of their primary natural defense mechanisms. A good dust bath smothers and dislodges mites physically, and certain materials enhance its effectiveness significantly.
Wood ash is one of the best natural additions to a dust bath for mite control. Its fine, dry particles work similarly to DE in disrupting mite exoskeletons, and it also raises the pH of the dust bath surface, creating an inhospitable environment for mites and other parasites. Mix wood ash into your birds’ existing dust bath area or create a dedicated bathing box filled with a combination of dry soil, wood ash, and food-grade DE.
Make sure your birds always have access to a dry dust bathing area — especially important if they’re confined to a run that gets wet. A covered dust bath area, or a large container filled with dry material inside or under shelter, ensures they can bathe year-round regardless of weather.
If your birds have a heavy mite load, you can also hold individual birds and work dry wood ash or DE through their feathers manually, paying close attention to the vent area and under the wings.
Natural Treatment 3: Neem Oil
Neem oil, extracted from the seeds of the neem tree, has well-documented insecticidal and repellent properties. It contains a compound called azadirachtin that disrupts the life cycle of insects and mites, inhibiting their ability to feed, molt, and reproduce.
For coop treatment, mix neem oil with water and a small amount of liquid dish soap (to help it emulsify) and spray it onto roost bars, nesting box surfaces, cracks, and crevices. A common dilution is around 2 tablespoons of neem oil per gallon of water with a few drops of soap. Apply after cleaning the coop thoroughly so the oil can reach surfaces rather than sitting on top of debris.
For direct bird treatment, neem oil can be diluted and applied to affected areas of the plumage — particularly around the vent — but use it carefully. Neem oil has a strong smell that some birds find irritating, and it should never be applied near the eyes or in high concentrations. Test on a small area first and observe the bird’s reaction.
Neem oil also works well as a preventive spray — applying it to roost bars and nesting boxes every few weeks as part of routine maintenance makes the coop less hospitable to mites before an infestation takes hold.
Natural Treatment 4: Garlic Juice Spray
Garlic has natural sulfur compounds that repel a wide range of parasites, including mites. While the research on garlic as a mite treatment is less extensive than DE or neem oil, many experienced backyard keepers report good results using it as part of a multi-pronged approach.
Crush several cloves of garlic and steep them in water overnight, then strain and use the liquid as a spray on roost bars, nesting boxes, and coop walls. Some keepers add a small amount of garlic juice or crushed garlic to drinking water as well — at low concentrations, this is generally considered safe and may help repel mites from the inside out, though evidence is mostly anecdotal.
Garlic spray works best as a deterrent and supplement to other treatments rather than as a standalone solution for an active infestation.
Natural Treatment 5: Coconut Oil for Scaly Leg Mites
For scaly leg mites specifically, the treatment approach is different from other mite types. Because these mites burrow under leg scales, the goal is to smother them by coating the legs thoroughly with a thick substance that blocks their air supply.
Coconut oil is one of the most effective natural options for this. Warm it slightly until liquid, then apply generously to affected legs, working it under lifted scales as much as possible. Repeat every two to three days for several weeks. The scales won’t return to normal immediately — it can take a full molt cycle for legs to look healthy again — but consistent treatment stops the mites and allows healing to begin.
Petroleum jelly (Vaseline) is the traditional remedy for scaly leg mites and works on the same smothering principle, though some keepers prefer coconut oil for its additional antimicrobial properties.
The Coop Cleanout: Non-Negotiable First Step
No natural treatment works well on top of a heavily infested coop. Before applying any treatment, a thorough cleanout is essential — especially for red mites, which can survive for months in coop crevices without a blood meal.
Remove all bedding and dispose of it away from the coop. Scrub all surfaces — walls, floor, roost bars, nesting boxes — with hot soapy water or a diluted white vinegar solution. Pay particular attention to joints, gaps, and crevices where mites hide in large numbers. Allow everything to dry completely before applying DE, neem oil, or other treatments.
After cleaning, apply your chosen treatment to all surfaces before adding fresh bedding. This is when you’ll get maximum penetration into cracks and maximum contact with any remaining mites.
In severe infestations, some keepers use a propane torch briefly on wooden roost bars and wall joints to kill mites and eggs in crevices — a technique that requires care but is highly effective on stubborn populations.
Treating Your Birds Directly
Coop treatment alone won’t resolve an infestation of northern fowl mites, which live permanently on the birds. Each bird in the flock needs to be treated individually, and all birds should be treated at the same time to prevent reinfestation.
Examine each bird by parting feathers in the vent area, under the wings, and around the neck. Apply your chosen treatment — DE dusted through the feathers, diluted neem oil applied to affected areas, or a wood ash rub — and work it as close to the skin as possible where mites live and feed.
Repeat treatment on all birds every 7 to 10 days for at least three treatment cycles. Mite eggs are not always killed by the initial treatment, so repeating at intervals breaks the life cycle by targeting newly hatched mites before they can reproduce.
Prevention: Building a Mite-Resistant Routine
Once you’ve eliminated an infestation, keeping mites from returning is far easier than treating an established population. A few habits make a significant difference.
Maintain dust bathing access year-round. A dry, accessible dust bath with wood ash and DE mixed in is your flock’s first line of defense. Birds that dust bathe regularly are significantly less likely to develop heavy mite loads.
Inspect birds monthly. Part feathers around the vent and under the wings of a few birds each month. Catching a small mite population early means treatment is quick and simple rather than an all-hands battle.
Check the coop after dark. Red mites are invisible during daytime inspections. A monthly nighttime check with a flashlight, running your finger along roost bar joints and looking for tiny moving specks, catches red mite populations before they explode.
Quarantine new birds. New additions to the flock are the most common source of mite introductions. Keep new birds in a separate area for at least two weeks and inspect them thoroughly before integrating them with your existing flock.
Apply preventive treatments regularly. A light dusting of DE in bedding and nesting boxes every few weeks, and a neem oil spray on roost bars monthly, makes the coop environment consistently inhospitable to mites without waiting for an infestation to develop.
When Natural Methods Aren’t Enough
Natural treatments work well for mild to moderate infestations and as ongoing prevention. But if you’re dealing with a severe infestation — birds that are visibly anemic, pale-combed, losing significant weight, or showing extreme feather loss — natural methods alone may not act fast enough. In these situations, a veterinary-approved treatment may be necessary to protect your birds’ health while natural methods are used to address the environment.
Monitor your birds closely during any mite treatment protocol. If you don’t see clear improvement within two to three weeks of consistent natural treatment, consult a poultry vet.
The Natural Mite Control Routine at a Glance
Responding to an active infestation: full coop cleanout first, then treat all surfaces with DE and neem oil, treat all birds directly at the same time, repeat bird treatment every 7 to 10 days for three cycles, and recheck the coop after dark one week after initial treatment.
Ongoing prevention: monthly bird inspections, monthly nighttime coop check, DE in bedding and nesting boxes every few weeks, neem oil spray on roost bars monthly, dust bath with wood ash and DE always available, and quarantine all new birds before introduction.
Mites are common, but they’re manageable. A consistent routine and early detection make the difference between a minor inconvenience and a flock health crisis.